How I brought LCP down to under 350 ms for Google-referred users on my website
Laying the foundation for super-fast performance with Signed Exchanges (part 1 of 8)

Originally published December 2023, substantially updated January 2025.
Do most of your users come from Google? You can maximize the performance of your website by using the techniques presented in this and further posts.
The speed of your website is considered good if the value of the Largest Contentful Paint (LCP) metric is below 2500 ms. I’m going to show you how I took it below 350 ms on a dynamic, production website with a lot of images, even on a slow connection.
If you wonder what is the point read this. Now, take a look at what it feels like (if you prefer, here is a YouTube version):
On the recording, you can see I started by clearing Chrome browsing data. This ensures the cache is empty, which resembles a first-time visitor.
I typed in a search phrase and got results from Google. I downgraded the connection speed and visited the website. Even on slow 3g, it took 140 ms to load the page (LCP). In my observations, the results may vary between 100-350 ms.
If you need a comparison, perform the above steps for any other website. As of 2025, most will give you 10+ seconds to load.
How to achieve LCP below 350ms?
How was it possible to load the entire page including CSS, custom font, and images in a fraction of a second on a slow connection? Have I used the Pied Piper compression algorithm?
If you haven’t guessed already, I will tell you that the page would behave exactly the same if instead of throttling the connection I cut it entirely off.
This leaves us with only one possibility. The website HTML and all critical resources such as stylesheets and images have to be prefetched by the browser on the Google results page. After clicking on the link, even when offline, the page can be displayed almost instantly from the browser cache.
Now, you see, the demo wasn't entirely honest. I arranged things so that the preloading hasn’t been throttled. However, I believe in normal circumstances (when the connection is not extremely slow) the time users spend on Google results is enough for the preload to complete, so the effect on LCP will remain the same as in demonstration video.
How do I make Google prefetch my website?
You need to:
Have a page that frequently appears in Google search results.1
Properly implement Signed Exchanges. This and further posts will focus mainly on that.
What are Signed Exchanges?
Signed Exchanges or shortly SXG is being developed by the Web Incubator Community Group which is a community group of the W3C that incubates new web platform features. In the context of IETF standardization, SXG is still a constantly updated draft.
Despite it being not 100% finished, it works in Chrome-based browsers, there is an open-source server implementation, and Cloudflare offers it for paying customers.
Basically, it works as standard prefetching, but with a twist: the website being prefetched can’t tell who does it and when. This is important for user privacy and critical on the Google results page because we don’t want website owners to track our searches.
How does SXG work in the context of Google search?
The Googlebot visits the website. It tells the website it understands the SXG format by setting the appropriate Accept HTTP header.
The website serves the SXG version of a page instead of a raw HTML. SXG encapsulates HTML and is signed with a website private key.
Google saves the SXG to its cache. The cache is located at the webpkgcache.com domain.
Later, the user visits the Google website and types the search phrase.
Google responds with the results page.
The results page instructs the user’s browser to request the SXG version of the website from Google cache…
…download it…
…and store into the browser’s prefetch cache.
The user finally decides to visit the page. There is no need to request the website via the network because the page is prefetched.
The browser extracts HTML out of SXG and begins to render the page.
Even if the website is physically loaded from Google, the URL bar in the browser shows the actual website URL. The browser can display it because the SXG is signed, so it can be trusted like the original website.
There is a downside. Your page has to be cached. If your page changes after being downloaded by Googlebot, the user will see the old version.
So here’s the catch, you may think. I agree, that there are use cases that disqualify SXG. But I believe many websites, not only static ones, will work perfectly fine. Mine is the perfect example. And there are ways to minimize the damage of stale content being served.
How to generate Signed Exchanges?
You can generate SXG on your own or use a service that does it for you such as Cloudflare2. I chose the second option because I’m already a Cloudflare customer.
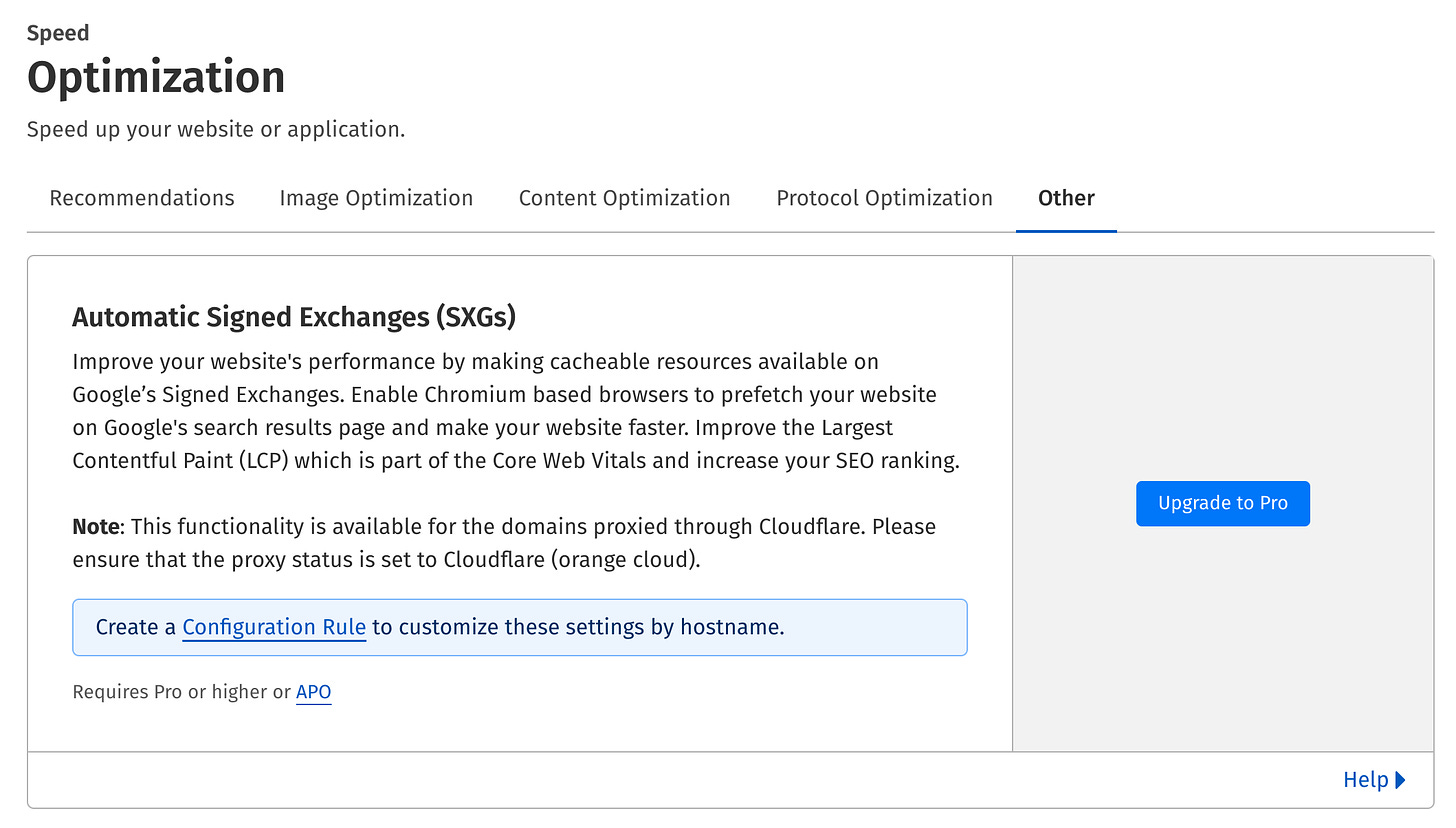
Ok, probably the true reason is I’m lazy and Cloudflare makes turning on SXG a single click (assuming the website is already proxied through Cloudflare).
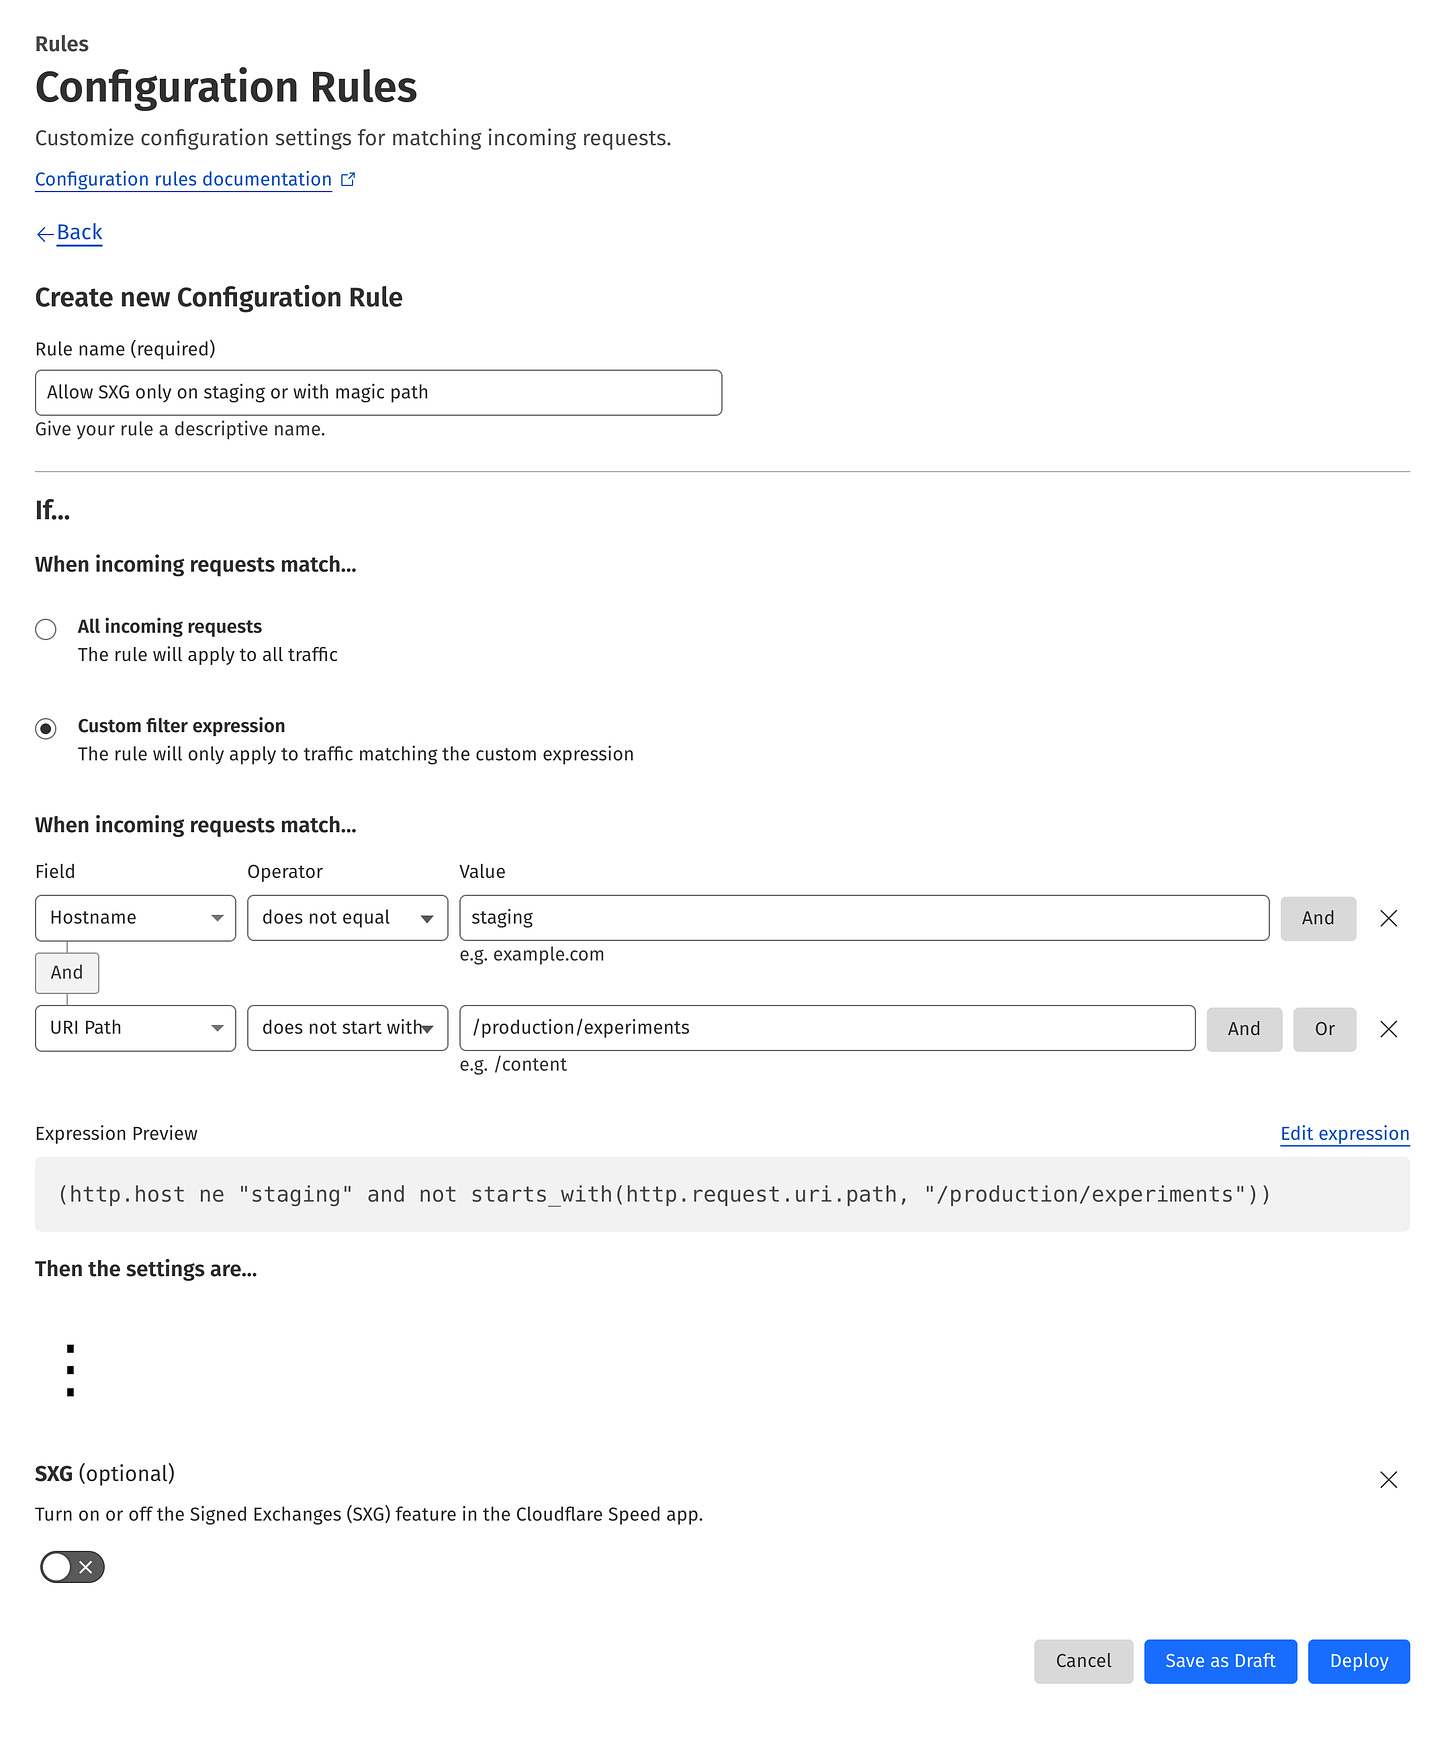
As you can see, SXG is a global configuration switch for the entire website. To make it more granular, you can create a Configuration Rule that disables SXG if the URL/subdomain doesn’t match the part of the website you want SXG to be enabled. This may be handy for testing SXG without impacting the entire site.
Is that it?
This post wouldn’t make sense if all I needed to do was enable SXG in the Cloudflare panel. There were certain decisions I needed to make, and requirements my website had to meet.
This and upcoming posts will show you my path of making the existing website to become fully SXG-enabled. I will include a lot of details and workarounds for various quirks I discovered during hours of debugging and black-box testing.
I was striving to write in a way that is understandable for a web developer interested in performance optimization. However, this text focuses on practical implementation. Therefore, most discussions and code examples use Ruby on Rails and Next.js, the frameworks used by my website. If you are not interested, you can skip those parts, they are clearly marked.
Without further ado, let’s get started!
Content generation vs content distribution
First, I had to give up the idea that I had 100% control over my website traffic. From now on, the pages generated by my server will be distributed to the users by the infrastructure I can control only partially if at all.
Google supports SXG cache purging, but it is asynchronous, from my observations slow and you can’t purge more than one, specific URL at once. Compare it to Cloudflare where you can purge cache for example by URL prefix3, or even purge the entire cache in one step. You can achieve similar results with the nginx cache4.
And nothing prevents someone from downloading the SXG version of my website and hosting it anywhere. When the browser visits it, it will still behave exactly, as it was on my website. And I won’t see the request coming to my server.
The HTTP request becomes decoupled from the HTTP response which has a life of its own. Just like a mobile app - after the user installs it, you lose control over it.
I will be able to see only a subset of requests from users, the rest will be handled by an opaque cache hosted by Google. My logs won’t reflect all the traffic my website gets. So no server-side page view counting and other request-based analytics.
The only thing I can control is the amount of time the SXG version of a given URL is valid.
No server-side personalization
Given the above, the HTML returned for a given URL should be the same for all visitors, no matter what’s included in the HTTP request5. I needed to serve the same page regardless of the login status of the user, the cookies6, device and browser, the country the user came from, and the language he/she had set.
This becomes a problem because the user expects the page to look different depending on the above variables.
The obvious solution is to customize the page client-side, in the browser. Javascript has to query API endpoints, maintain state using browser storage, and adjust the page. CSS has to be used for responsiveness, as serving separate versions of the page depending on the User-Agent header or redirecting mobile users to a subdomain is not an option.
Caching
The basic rule of making the app SXG-friendly is to make it cache-friendly because the SXG version of the page will eventually land in Google SXG cache.
To be cacheable, it is best if the HTTP response includes a Cache-Control header.
A note on Cloudflare cache
By default, Cloudflare caches static assets but doesn’t cache HTML responses, even if they set the Cache-Control header to allow that.
SXG will work perfectly fine without changing this configuration. Actually, it’s easier to implement SXG without caching HTML in the Cloudflare cache because you don’t need to worry about accidentally caching a private user’s state.
However, I decided to utilize Cloudflare cache for HTML to maximize the performance benefits. The rest of the steps in this and the following posts assume the HTML will be cached this way.
Cache configuration
The Cache-Control header, among other things, allows you to set the maximum amount of time the page is considered fresh and can be kept in the cache. Particularly max-age and s-maxage directives can be used for that. Here is an example:
Cache-Control: public, max-age=600, s-maxage=3600It tells the browser to cache the page for 600 seconds, or 10 minutes (max-age directive).
It also tells so-called shared caches (for instance Cloudflare cache or Google cache) to cache the response for 3600 seconds, or 1 hour (s-maxage directive). In the absence of s-maxage, shared caches would use max-age.
Note the difference in spelling: max-age vs s-maxage. I experienced quite a bit of frustration while debugging why
s-max-agedoesn’t work!Helpful tip: Both directives are written with exactly one hyphen.
You will find a detailed explanation of all Cache-Control directives here.
Google won’t cache SXG if max-age/s-maxage is less than 120 seconds. You can encounter the following warning in SXG Validator (debugging tool described later) or directly in the HTTP response generated by SXG cache:
199 - "debug: content has ingestion error: Error fetching resource: Content is not cache-able or cache-able lifetime is too short"The solution is to increase the value of the max-age/s-max-age directive within the Cache-Control HTTP header to something higher than 120 seconds (in real life, much higher; otherwise, the cached version will hardly be used).
Apart from that, you can’t use private, no-store, and no-cache directives, otherwise, SXG won’t be generated by Cloudflare. Cloudflare SXG generator doesn’t allow you to set the maximum age to a value higher than 7 days7.
The default Cache-Control header set by Rails, Next.js, and other frameworks typically prevents HTML caching, which consequently disables SXG. This is actually beneficial, as it lets you selectively enable SXG/caching for specific sections of your application while maintaining safety for the rest of your codebase.
Choosing cache expiration times
I had to decide how long to cache HTML pages. It was tough. Naturally, we all want to get the freshest data possible. But we also want to get it immediately. Those two needs are opposite to each other.

The content on my website doesn’t change very often, and I’ve observed that Google typically refreshes its cache more frequently than the Cache-Control header value suggests.
After carefully considering all business requirements, I decided to set the cache duration to 24 hours. This value is also recommended in a post by Devin Mullins, one of the SXG implementers at Google, and it strikes a good balance between minimizing staleness and optimizing performance.
As a result, I configured the s-maxage to 1 day.
There are advanced ways to further minimize users’ exposure to stale data, especially when utilizing Cloudflare cache. However these methods are highly application-specific. Sharing them publicly would likely benefit only competing websites, so I’ve chosen to keep them private.
Caching in Rails
I added the following code in every Rails action I wanted to enable for SXG:
response.headers['Cache-Control'] =
  "s-maxage=#{24.hours.to_i}, public"
Caching in Next.js
To set the required header in Next.js I used the context parameter passed by the framework to the getServerSideProps():
context.res.setHeader(
  "Cache-Control", `s-maxage=${24 * 60 * 60}, public`
);
Keep in mind that Next.js will override the Cache-Control header value in development. The changes can be observed only in production.
HTTP headers to avoid
Cloudflare provides a full list of SXG requirements. The important part is a list of disallowed response HTTP headers, such as Set-Cookie. If your app responds with one of those, SXG won’t be generated for a given page. The intention is to prevent making potentially private information public.
I was unable to provide a real-world example of vulnerability prevented by this safeguard. That’s because of additional safety measures coming in.
This is the only thing that came to my mind. Let’s assume Set-Cookie is allowed when generating SXG. Imagine the following scenario:
User submits login information, the page reloads and sets the session cookie.
The page gets in Cloudflare cache along with Set-Cookie header. From now on, all users visiting this page get immediately logged as the user from previous step. That’s already a disaster.
Now Googlebot fetches the SXG version of this cached page (including cookies) and publishes it in its SXG cache. Everyone can download it and extract session cookies of the unfortunate user. It’s possible even after fixing website and purging Cloudflare cache.
Of course, the correct way of mitigating this vulnerability is to invalidate all session cookies after fixing the page. But the point is Cloudflare tries to limit the damage by stopping the private information from leaking further.
Fortunately, the above scenario won’t happen in real-life. That’s because of additional Cloudflare safeguard that excludes pages with Set-Cookie header from being cached. I suspect Google also won’t cache SXG with cookies, but I haven’t verified that.
If you have a real-world example of the vulnerability Cloudflare prevents with this measure, leave a comment below.
As most websites use cookies, you may think it disqualifies SXG usage. I strongly believe that’s not the case.
You can use Google Analytics and other cookies set by the browser. Only cookies returned with server-side generated HTML pages are prohibited. And there are ways to handle those cases too.
Session cookie
When you generate a page server-side, typically a session cookie is set. This depends on the framework you use, so you need to check by yourself. For example, Next.js doesn’t use session cookies while they are used extensively in the Rails.
As mentioned above, SXG won’t be generated when your response contains cookies. Therefore I needed to adjust my Rails app.
In every SXG-enabled controller action, I needed to make sure the Rails session was not being used. That’s because loading it automatically sets a cookie in the response. Searching the code for the “session” string allowed me to pinpoint all the places I needed to update.
CSRF protection
In the Cross-Site Request Forgery (CSRF) the attacker tricks the user into performing certain actions in the vulnerable web application.

Modern frameworks using cookie-based authentication implement appropriate protections. In some cases, those mechanisms may prevent SXG from being generated. Adjustments may be necessary.
Warning
Interfering with security mechanisms should be done with great care. Developer doing so should be familiar with computer security, and understand CSRF attack and prevention methods.
Flawed implementation may lead to serious vulnerabilities.
On the other hand, come on, it's not rocket science! Understanding CSRF is fairly easy; you don't need a PhD.
Rails CSRF approach
If you use a different framework, you can safely skip this and the following section.
Rails uses unique, session-bound CSRF tokens which are embedded into HTML and later sent in every unsafe request (using methods other than GET or HEAD), such as form submission or AJAX. After being received by the server, tokens are checked against the user session, and requests containing invalid tokens are rejected.
This mechanism is very effective but doesn’t work well with caching. The cached page would include CSRF tokens. They were valid for the user visiting the page before it was cached. But for every subsequent user, those tokens will be invalid because their sessions don’t match those tokens. Users won’t be able to perform any operations, as all their requests will be rejected.
How to make Rails CSRF protection cacheable
I fixed it by transmitting the CSRF token as a cookie using a separate API endpoint that’s not cached. The front end performs an API request and uses a CSRF token from the cookie to patch the HTML of the current page.
Before proceeding, CSRF tokens must be removed from the HTML. This is necessary for two reasons:
It makes the HTML cleaner.
More importantly, CSRF tokens are tied to sessions. Their presence triggers session loading, which in turn sets cookies—exactly what we're trying to avoid.
All the form tags used on SXG-enabled pages have to include the authenticity_token option set to an empty string. This way forms will include empty tags, which could be updated later by the front end.
<%= form_with model: article, authenticity_token: '' do |form| %>
  ...
<% end %>
The other place containing the CSRF token is the csrf_meta_tags helper in the layout. It is used by Rails javascript to add an X-Csrf-Token HTTP header to AJAX requests. It should be replaced with static HTML to be updated later:
<meta name="csrf-param" content="authenticity_token" />
<meta name="csrf-token" content />
The API controller simply sets the cookie and returns a 200 status code:
# app/controllers/api/cookies_controller.rb
module Api
  class CookiesController < ActionController::API
    include ActionController::Cookies
    include ActionController::RequestForgeryProtection

    def index
      # Calling #form_authenticity_token loads the session
      # automatically. So apart from the csrf_token cookie,
      # the response will also include the session cookie.
      cookies[:csrf_token] = form_authenticity_token
      head :ok
    end
  end
end
To make it accessible, the following route should be added to config/routes.rb:
namespace :api do
  resources :cookies
end
Then some javascript needs to be executed in the front end:
fetch('/api/cookies').then(() => {
  const cookie = document.cookie.split('; ')
    .find(row => row.startsWith('csrf_token=')) || '=';
  const token = decodeURIComponent(cookie.split('=')[1]);
  document.querySelector(
    'meta[name="csrf-token"]'
  ).setAttribute('content', token);
  document.querySelectorAll(
    'input[name="authenticity_token"]'
  ).forEach(input => { input.value = token; });
})
The above implementation is simplified for clarity. The production-grade javascript could be optimized to perform the request only once in a while, not on every page load. Also, it should gracefully handle cases where the CSRF token may become obsolete, such as login and logout.
Currently logged user
The common pattern in server-side rendered web applications is to keep the ID of the currently logged user in the session. This way user information may be fetched from the database and included in the response. In the context of caching, this approach has 2 problems:
The resulting HTML is different for every user.
The session is used, therefore the response sets a cookie.
The solution is to use JavaScript to perform an API request to the endpoint that returns current user information and then update the page client-side.
First impression optimization
One of the decisions I had to make was to optimize for the first-time user. The first impression he/she gets greatly contributes to him/her staying on the page or leaving.
That’s why all the pages of my website use server-side rendering. This way user gets the page quicker compared to rendering it client-side.
When the user is logged in, the section in the screen's upper-right corner on the desktop shows his/her name and profile picture. Otherwise, the user section is replaced with a “Login / Register” link.
Initially, the above space remains empty and only after the user's state is known, it is filled. On a slow connection, it may take a while to perform the API request which slows down the appearance of the user section.
That’s why I assume a first-time user is not logged in and the front end doesn’t need to perform the above API request at all. This way “Login / Register“ could be displayed immediately.
After login, browser storage is used to mark the user as logged. This way, the browser can quickly check if performing an API request during the next page load is worth it.
You may think it’s just a detail. But there is also SEO aspect of this approach.
Most crawlers behave as first-time users for every request they make. That’s probably because they don’t keep state between requests, especially don’t store cookies.
In the presented case we saved 1 non-cache’able request per page, which quickly adds up given number of pages crawlers visits. Performant page saves bot’s crawling budget, which could be spent on crawling more pages.
Other cookies
I also had to make sure no other cookies were being set server-side. It was easy to search for all the places in the code setting a cookie. The hard part was to decide how to avoid using it. There were two options: make the front end responsible or remove given cookie usage entirely by solving the problem differently.
The final check is to use Chrome Developer Tools, preferably with cleared cookies or using incognito mode to simulate Googlebot and examine the app response. If the Set-Cookie header shows up, you need to go back to code.
HSTS
HTTP Strict Transport Security (HSTS) is a security policy ensuring browsers will always use a secure connection when connecting to your website.
Years ago, I enabled it in the nginx configuration. The web server was setting the Strict-Transport-Security HTTP header on all responses. By default, Rails sets this header in production too.
Unfortunately, the Strict-Transport-Security header prevents the SXG from being generated. I had to revert the changes I made to the Nginx configuration. In Rails case, the only change needed was to set config.force_ssl to false.
If you use a different stack, you may need to check the documentation of your web server and framework to find a way to disable HSTS.
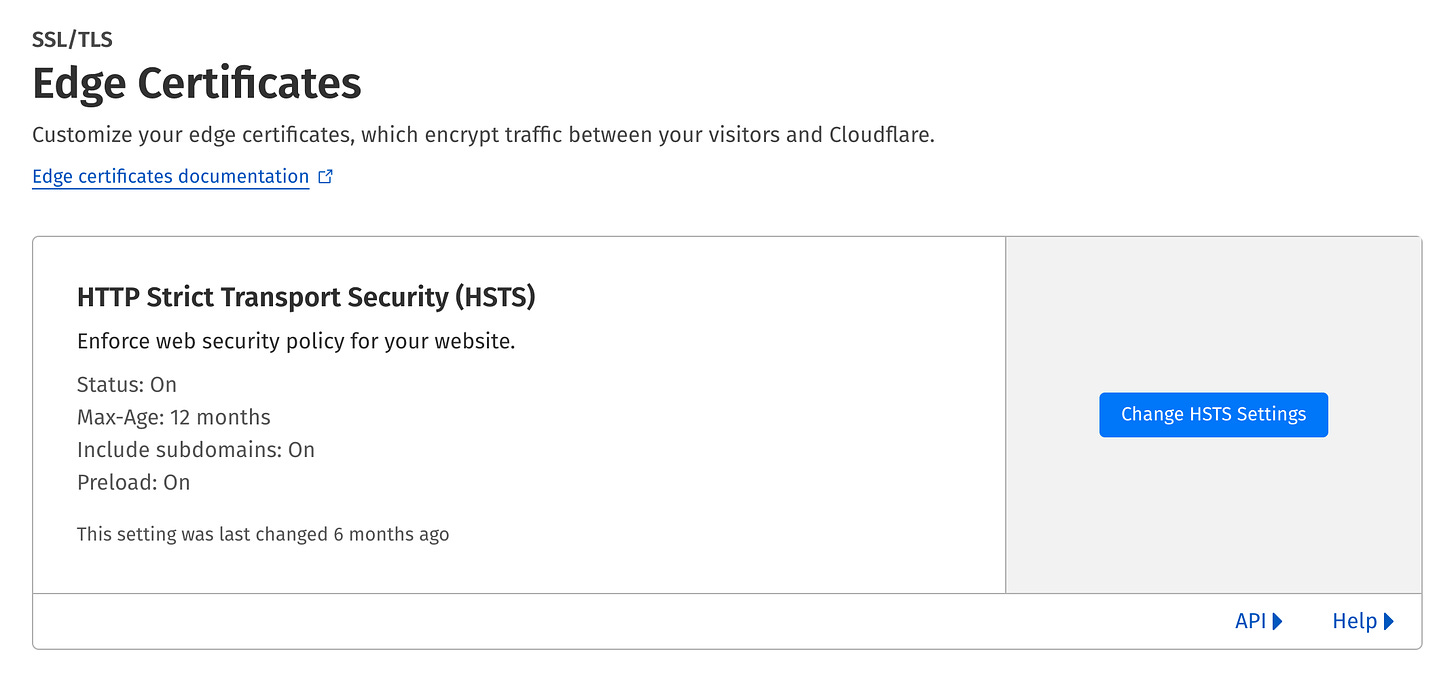
Fortunately, HSTS can still be used by setting a flag in Cloudflare configuration.
It sets the HSTS header, but in a SXG-compatible way, so that:
the standard response includes the header,
the SXG response includes it too,
the standard response encapsulated in SXG does not include it.
Writing tests
It’s always good to have tests, and in this particular case, it was especially important. That’s because it is very easy to make a code change that breaks SXG, and the effects will be invisible in development and hard to spot in production.
During future development, I expect things like adding new cookies and accessing the session directly or indirectly would be the most common causes of SXG breakage.
That’s why I implemented tests checking the responses for required/prohibited headers according to the Cloudflare specification. Here is a spec for the Rails app:
require 'rails_helper'

RSpec.describe ReplaceWithYourController, type: :request do
  before(:context) do
    # Add app-specific initialization logic before making a request
    get "/replace-with-your-sxg-enabled-page"
  end

  let :cache_control_headers do
    %w[
       Cache-Control Cdn-Cache-Control
       Cloudflare-Cdn-Cache-Control Surrogate-Control
      ]
  end

  let :forbidden_headers do
    %w[
        Authentication-Control Authentication-Info Clear-Site-Data
        Optional-WWW-Authenticate Proxy-Authenticate WWW-Authenticate
        Proxy-Authentication-Info Public-Key-Pins Sec-WebSocket-Accept
        Set-Cookie Set-Cookie2 SetProfile Strict-Transport-Security
      ]
  end

  let :forbidden_directives do
    %w[private no-store no-cache max-age=0]
  end

  it 'does not use forbidden HTTP headers' do
    expect(headers).not_to include(*forbidden_headers)
  end

  it 'does not use forbidden cache directives' do
    cache_control_headers.each do |header|
      next unless headers[header]
      expect(headers[header]).not_to include(*forbidden_directives)
    end
  end
end
In addition, I created tests for application-specific requirements, for example, if s-maxage is being set to the correct value.
Caching the HTML
At this point, the application was ready for Cloudflare to begin caching its HTML content.
The easiest way to accomplish that is to define the cache rule. To do that, go to Caching → Cache Rules and hit the Create rule button. Then provide a name for the rule, choose All incoming requests, and Eligible for cache. The form contains a lot of other settings, they don’t need to be changed. I removed them for readability in the screenshot below:
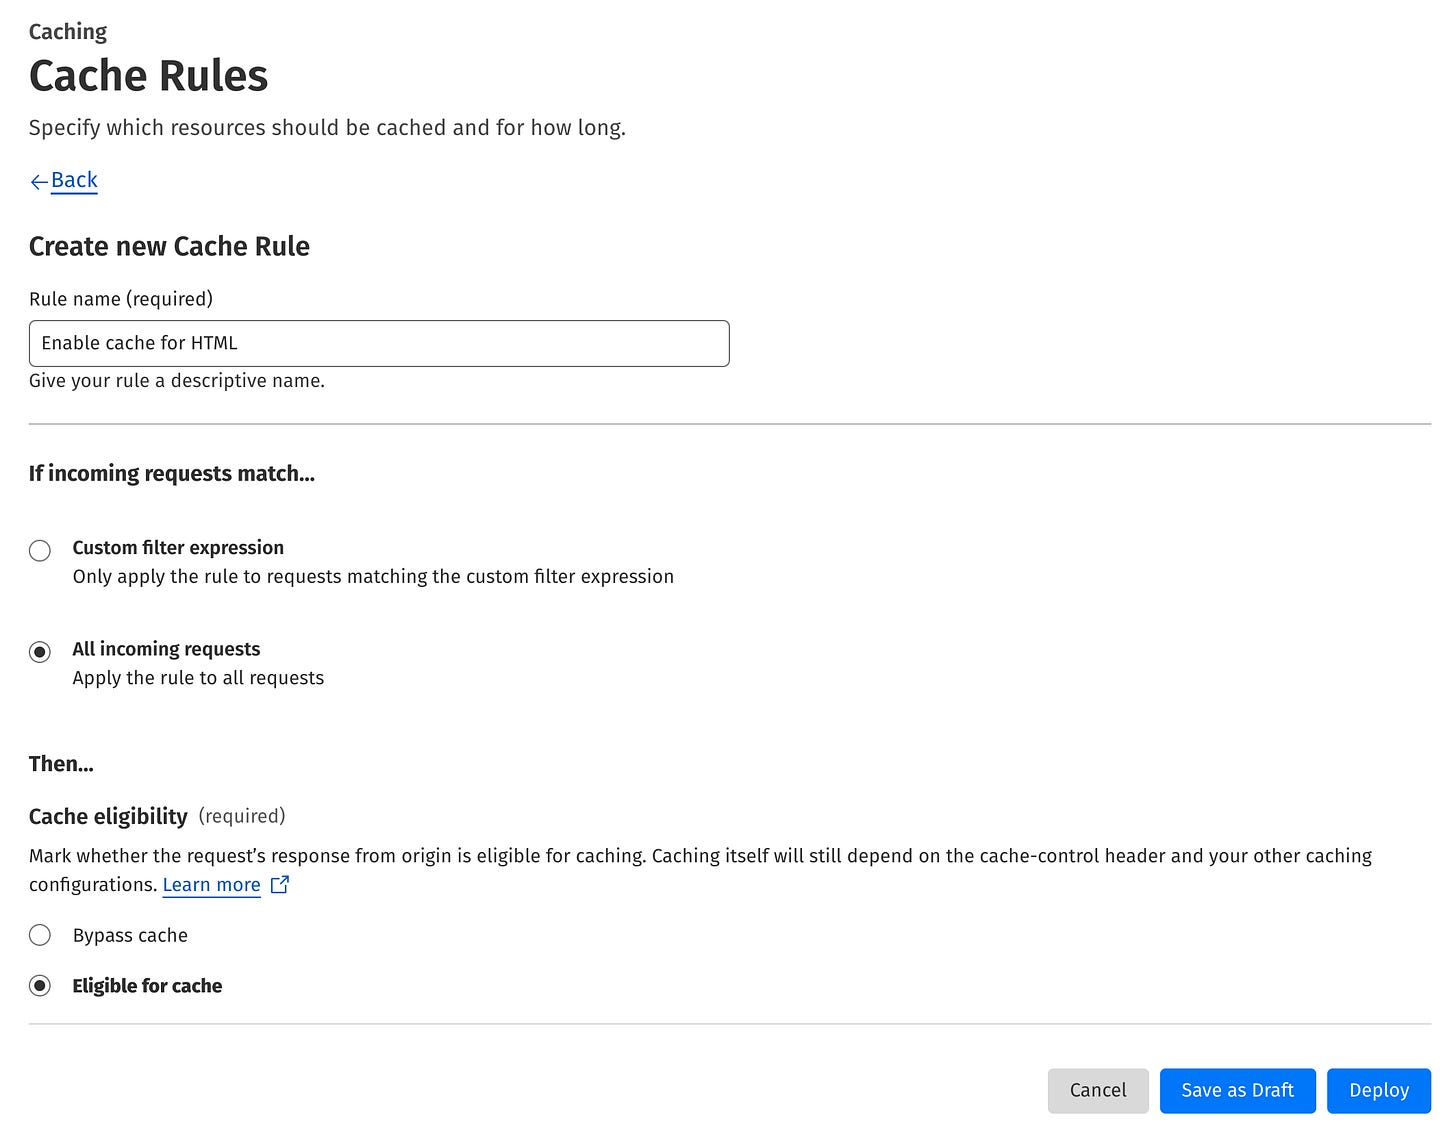
⚠️ WARNING: This cache rule enables HTML caching site-wide. To test safely, start by applying it to a limited set of URLs using a custom filter expression. This allows you to verify everything functions as expected before broader deployment.
When you feel comfortable with the rule, hit the Deploy button to activate it.
Testing on production (!)
After implementing the above changes and making sure tests passed, I was ready for the production deployment to validate if Cloudflare generates SXG correctly.
Well, actually it wasn’t that simple.
This topic was new to me, there were many unknowns and a lot of learning and experimentation in the process. Also, at the same time I was implementing other performance optimization features. It wasn’t a linear process, like described here. I needed to deploy often and test - on production.
I decided to do this because the risk of something going wrong was minimal. The worst that could happen was Cloudflare failing to generate SXG. And this was my starting point - not a big deal.
When testing SXG I used the following tools and techniques:
SXG Validator
This Chrome extension allows you to quickly check if the current page has an SXG version available. Also, it triggers Googlebot to fetch the page and put it into the Google SXG cache if it’s not already there. It then tells you the status of the page in the cache and displays errors if Google for some reason rejected the page.
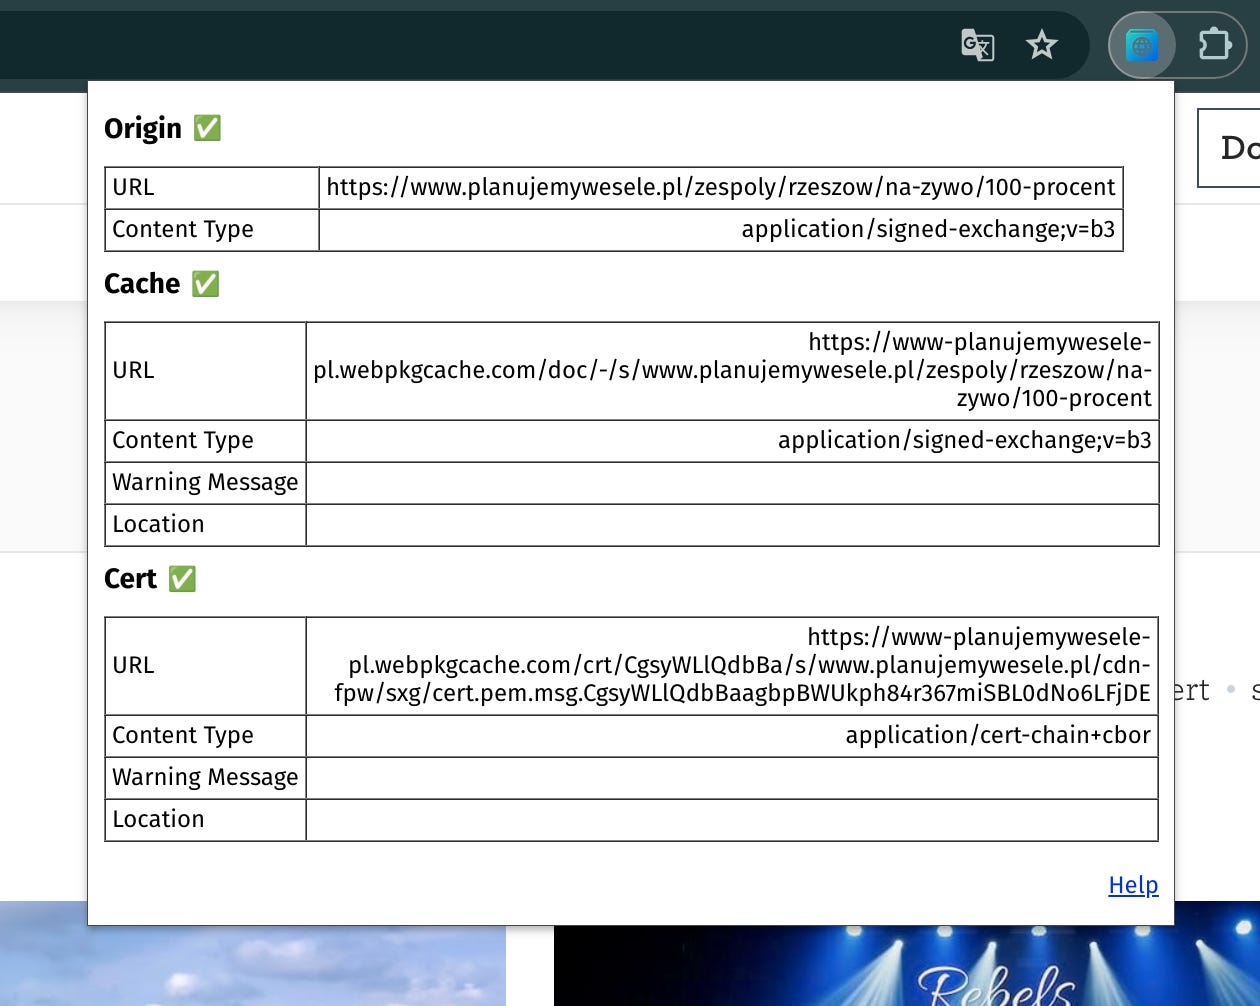
As I update this post, the extension's metrics have grown slightly: from 837 users and 1 review in December 2023 to 1,000 users (though still with just 1 review).
It tells a lot about SXG's popularity on the web. But fear not! Most websites don’t use SXG, but it doesn’t mean the tech is to blame. The tech is solid, and the websites using it outperform others.
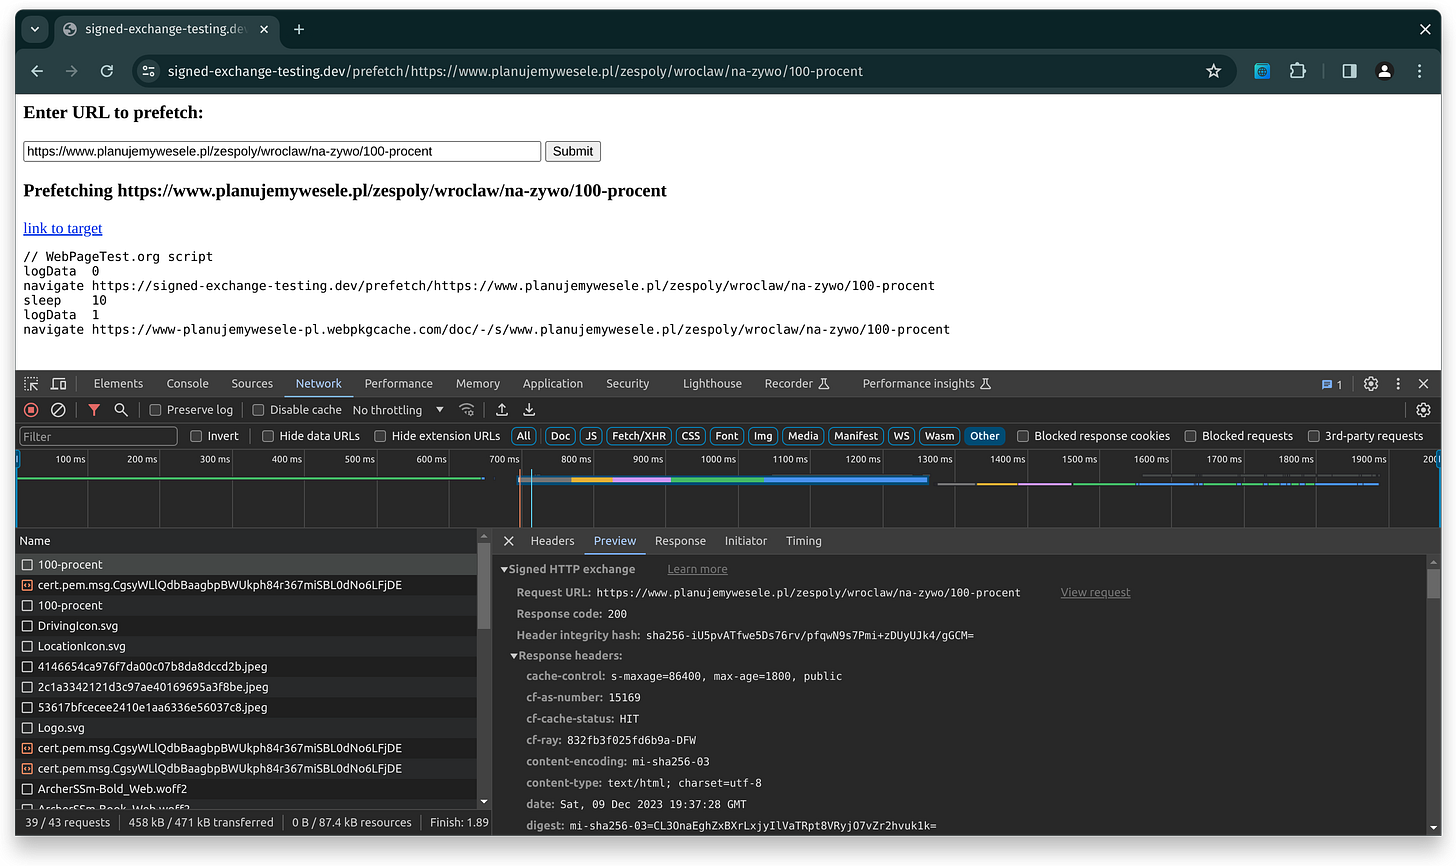
SXG prefetch page
A simple page that prefetches a specified URL the same way Google does. Very useful, because you don’t need to wait until your page is indexed and presented in search results, on high positions.
When combined with the Network tab in Chrome Developer Tools, you can easily see exactly what HTTP requests are being performed after prefetching is triggered. To see only the SXG traffic, use the Other filter.
Curl
This well-known tool allows you to see the raw, HTTP-wrapped SXG response. Just specify the appropriate Accept HTTP header:
$ curl -siH "Accept: application/signed-exchange;v=b3" \
    https://www.planujemywesele.pl/zespoly/opole | less

HTTP/2 200
date: Wed, 06 Dec 2023 18:55:40 GMT
content-type: application/signed-exchange;v=b3
content-length: 212278
vary: accept,amp-cache-transform
x-content-type-options: nosniff
report-to: {"endpoints":[{"url":"https:\/\/a.nel.cloudflare.com\/report\/v3?s=BE7oFSLfFhdPe1PYy6NGP%2BVvj9qeh4ZekE30ydqjTrxITTTxbDkzWHPm3LfvackhcPx0jE3XnWOreho%2Bl6cqUAYRl07dB8qLaCtdPHKyulebCrDnmhqFtuCPOcKtyeAVFQq2mq8dfhQ%3D"}],"group":"cf-nel","max_age":604800}
nel: {"success_fraction":0,"report_to":"cf-nel","max_age":604800}
strict-transport-security: max-age=31536000; includeSubDomains; preload
server: cloudflare
cf-ray: 8316be935976632e-LHR
alt-svc: h3=":443"; ma=86400

sxg1-b3^@^@ … binary data follows
Dump-signedexchange
While curl outputs the raw binary SXG format, which humans can decode manually, there's a more convenient option: a command-line tool written in Go that's part of a larger SXG utilities package. This tool simplifies the decoding process significantly.
Here is an example output. I removed the Link header contents and the signature for readability:
$ dump-signedexchange -payload=false -uri https://www.planujemywesele.pl/zespoly/opole

format version: 1b3
request:
  method: GET
  uri: https://www.planujemywesele.pl/zespoly/opole
  headers:
response:
  status: 200
  headers:
    Etag: "d1xui95j634kzc"
    Status: 200 OK
    Content-Type: text/html; charset=utf-8
    Cf-Cache-Status: HIT
    Content-Encoding: mi-sha256-03
    X-Content-Type-Options: nosniff
    Link: ...
    X-App-Id: 2
    Accept-Ranges: bytes
    Cache-Control: s-maxage=86400, max-age=1800, public
    Date: Wed, 08 Jan 2025 17:27:48 GMT
    Cf-Ray: 8fede682c14702a0-WAW
    Digest: mi-sha256-03=4Sh+fNgY++2HoZ4CzZwUTk4TvTfQKfBJvTOn586Ld7g=
    X-Frame-Options: SAMEORIGIN
    Age: 0
    Server: cloudflare
    Content-Length: 215609
signature: ...
header integrity: sha256-R9wSEb/HOpGyeJM9Inzr9Pz6+Zw2CV03sH6GT1ElH3s=
Please keep in mind both curl and dump-signedexchange won’t work when you use Cloudflare bot protection mechanisms, as those are not apps humans use for everyday browsing. They’ll be recognized as bots and blocked.
So either disable bot protection when you perform tests or use the next tool.
Headers-altering extension
There are many browser extensions allowing you to manipulate HTTP request headers. One I used was Requestly. Similarly to curl, you just need to set the Accept header to:
application/signed-exchange;v=b3It runs in the browser, so it can be used with Cloudflare bot protection enabled.
It works best when combined with Chrome Developer Tools, so you can see SXG response, nicely decoded with headers and stuff.
Google Search Console
When debugging, it's valuable to view your site as Google sees it. The Google Search Console provides a URL inspection tool with a Live test feature that lets you fetch any URL using Googlebot and examine the results.
When testing an SXG-enabled URL, Googlebot will show you the decoded SXG response, similar to what you'd see using the dump-signedexchange tool:
HTTP/1.1 200 OK
accept-ranges: bytes
cache-control: s-maxage=86400, max-age=1800, public
cf-cache-status: HIT
cf-ray: 8fedfc8990c86806-DFW
content-encoding: mi-sha256-03
content-length: 215601
content-type: text/html; charset=utf-8
date: Wed, 08 Jan 2025 17:42:51 GMT
digest: mi-sha256-03=H6SDmuJOXIr/v8Wcfjl++ilQBmaDOpj53i9CCVpdXkI=
etag: "7y1kp1nupp4kz4"
link: ...
server: cloudflare
status: 200 OK
x-app-id: 2
x-content-type-options: nosniff
Results
Implementing the above changes made it possible to generate the SXG version of the page HTML. Therefore prefetching it in Google results should make the LCP drop by… the time it takes to download HTML. On my connection, it’s probably somewhere between 100-600 ms, depending on how quickly the server responds.
But how does it compare to that 350 ms I promised and demonstrated earlier?
Well, it’s just the beginning. We have a solid foundation for further optimizations. The next step is to prefetch not only HTML, but the so-called subresources - stylesheets, images, and fonts. And this is where the LCP begins to drop significantly!
Thanks!
I would like to express my gratitude to my co-workers, Michał and Besufekad, for their support and assistance in debugging.
Thank you for reading this post. I really appreciate it, because it was a long read!
If you know someone struggling with high LCP, especially if the website in question gets a lot of traffic from Google, then please share this post. I would be grateful :)
See you in the next part of this series!
In the Help section, near the toggle for the Automatic Signed Exchanges option, Cloudflare states that:
Google only loads Signed Exchanges for the top results.
Contrary to the statement above, the position in Google search results does not appear to matter. I observed that SXG prefetching occurs even for pages ranked well beyond the top 10 results.
While I am not entirely certain, I suspect that the main factor determining whether a page will be prefetched is page popularity measured by impressions in Google search.
The other factors remain unknown to me. In my experiments, I observed that only one of the results on a given Google page is prefetched, and it is not always the top result.
I’m not aware of any other company offering SXG. It might be possible to implement SXG with Fastly using this repository, but I couldn’t find any official references to it on the company’s website.
This feature is available only for Enterprise customers (as of 2023).
This feature is available only in the Nginx commercial subscription (as of 2023).
There is a way to serve different versions of the page optimized for different screen sizes using the Vary HTTP header paired with the supported-media meta tag. I haven’t explored this solution, as my website uses a responsive design and Cloudflare has very limited support for caching responses with Vary header.
It is possible to enable selective prefetching for cookieless users. However, users with cookies set (typically those who have visited your page previously) won’t benefit from SXG prefetching. Since my goal was to improve page loading speed for as many users as possible, I chose not to explore this approach further.
In my experiments, I found not setting the Cache-Control header at all makes Cloudflare generate SXG expiring in 7 days, an equivalent of setting max-age/s-maxage to this value.




Very good read!